-
Posts
8 -
Joined
-
Last visited
Content Type
Profiles
Forums
Downloads
Everything posted by thegraffix
-

[XP11] Carenado Cessna Citation II S550 1.0.0
thegraffix commented on jaiimez's file in Alpha Flight Controls
-
Version 1.0.0
222 downloads
Honeycomb Bravo Throttle Quadrant Template Carenado FA50 EX v1.1 Import and activate via the Honeycomb Configurator v2.0.0.1 I've had the best success with 2.0.0.1 templates by starting X-Plane 11 and immediately reloading the bindings for all Honeycomb devices via the X-Plane 11 menu (e.g. Plugins > Honeycomb > BFC_Throttle > Reload Bindings). Honeycomb Config Tool tutorials: https://www.youtube.com/user/MrJaraNet/videos Obvious note: The blue cells (XP 11) are my own X-Plane 11 bindings. The dark gray cells are Honeycomb configurator bindings. Lights on the throttle quadrant will NOT illuminate without power to the aircraft Detent #2 = Calculates Vref (based only on weight) and assigns this speed to the IAS bug Wasn't able to find datarefs that hold the V speeds Reversers #1 and #3 are X-FEED valves (reverser ON = X-FEED ON) Reverser #2 is Thrust Reverse toggle for center engine (throttle #2 axis controls thrust reverse amount) From what I understand, most (all?) trijet outer engines do not offer thrust reverse You can get all 3x engines to reverse thrust via commands/datarefs Engine Start Procedure (Engine Stop is identical, albeit more sensitive): Throttle back/below detent Throttle forward, past detent a little bit Throttle returned to idle Engine shutdown can be a little flaky if you move the throttle(s) forward too far or too quickly Each engine's respective detent will toggle the latch, XFR PUMP and BOOSTER pump for that engine (and starter buttons) Door button opens cockpit door and outside door, turns on passenger entrance overhead light Releasing parking brake (Bravo button 1) will remove the Carenado static elements if present Overhead lights (button 3) toggles the center console, copilot overhead, passenger entrance and passenger reading lights Pilot overhead light is omitted from Switch #3 because it is tied to the (bright) main cabin overhead lights The red Throttle #1 TO/GA button is not assigned -
Version 1.0.0
73 downloads
Honeycomb Alpha Flight Control Template Carenado FA50 EX v1.1 Import and activate via the Honeycomb Configurator v2.0.0.1 I've had the best success with 2.0.0.1 templates by starting X-Plane 11 and immediately reloading the bindings for all Honeycomb devices via the X-Plane 11 menu (e.g. Plugins > Honeycomb > AFC_Yoke > Reload Bindings). Honeycomb Config Tool tutorials: https://www.youtube.com/user/MrJaraNet/videos Obvious note: The blue cells (XP 11) are my own X-Plane 11 bindings. The dark gray cells are Honeycomb configurator bindings. The ZIP file contains 2x different .json profiles - one for the XP11 FMS and another for the Reality XP GTN 750. The only difference is the magneto 'BOTH' switch. The magneto dial toggles between nav sources; 'BOTH' is for GPS nav source (stock FMS or GTN 750). The reason there are 2x NAV1 selections on the starter switch is to quickly switch from GPS to NAV1 when performing an instrument landing/procedure. The right-most NAV1 ('START' position) has a closer zoom level than the first NAV1 since it is for landing. TL;DR Basic Startup ====================================================== (give a solid 1-second count between each switch) ALT.....................ON (GENs) BAT.....................ON (BATs 1 and 2, bleeds, misc switches) BUS2....................ON (APU START, wait a few moments) BUS1....................ON (AVIONICS, Anti-Skid, Hyd Stby Pump, IRS) ENG START...............2,3,1 BRAVO SWITCH 6..........ON (Pitot heat and Air Start switches) BUS2....................OFF ====================================================== General Notes There is fragmented information available regarding a comprehensive and accurate accounting of real world normal procedures specifically for the updated EX version of the FA50 Carenado docs, Google/YouTube, and information/checklists from this thread as well as from a FA50 EX Bug List Forum were referenced Sometimes switches can be flaky, especially when rapidly or simultaneously activating 2x or more (e.g. X-FEEDs, certain light switches) I am considering making the ALT switch an up/down toggle switch for the 3x Air Start switches. The air start switches are 'switched' during flight; the generators are not, so it's a good candidate for a switch. NAV light will go to NAV-LOGO if it's dark outside Beacon (RED anticol) needs to be on before the strobe switch (ALL anticol) will respond Avionics BUS1 turns on only the LH AV MASTER switch, not both LH and RH Can't get both to turn ON/OFF with the single switch using the Honeycomb Configurator (XP doesn't play well with truly simultaneous commands/manipulators?) Only 1 AV MASTER is necessary. If both are on and one is turned off, all avionics get turned off. Some (not all) of the Thranda switch UP/DN Commands behave as toggle switches no matter how the switch is oriented. EG: Issuing a DN command when the switch is already down will move the switch UP (thranda/switches/SwitchDn26) Leveraging the thranda/Switch and thranda/SwitchMonitor dataref arrays for conditional logic proved unsuccessful Editing the values of 'ScrollFriendly' within the 'manifest.json' file proved to be ineffective and problematic (suggested by this forum) The left/white yoke button straightens/aligns the labeled MCP/center console knob faces back to a readable 12 o'clock position (but does not actually affect values or turn the physical manipulator/knob) I have this button assigned in XP11 as well (in addition to the Configurator binding) to 'Saved Camera #8' This goes to my main pilot view and simultaneously presents (right-side up) readable knobs The macro-heavy switches are intended to perform the majority of checklist items, simplifying the startup procedure Some system elements don't appear to function or contribute (hydraulics, bleed isolation knob, etc) Some of the smaller items have been intentionally omitted from the macro-heavy buttons, such as the resetting of the fuel-used counter, RH Avionics Master, etc ALT Gens 1,2,3 BAT Batteries 1 and 2 Pilot arm rest (up) Computers 1,2,3 (AUTO) Emergency Lights (ARM) Bleeds (all x7) (AUTO) Air Start switches 1-3 (GRD START) Overhead, pilot and co-pilot, MCP/shield/instrument lights (turned on) No Smoking sign (ON) IRS (to 'ALIGN') Windshield Heat (NORM) Annunciator Light Test switch (press 1x) Isolation Valve (to horizontal) BUS1 LH AV MASTER IRS (to 'NAV') Anti-Skid (ON) Hyrdraulic Standby Pump (AUTO) BUS2 APU start/stop *APU start sets the problematic and buggy dataref sim/cockpit2/bleedair/actuators/apu_bleed to 1. This will allow you to start the engines again after the first shutdown. -
Version 1.0.0
191 downloads
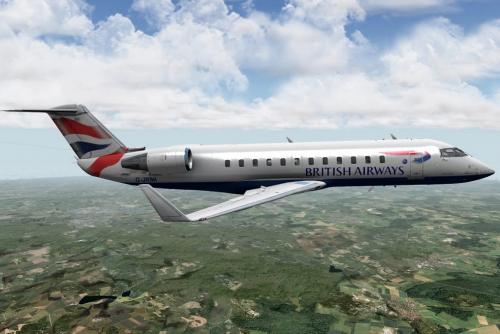
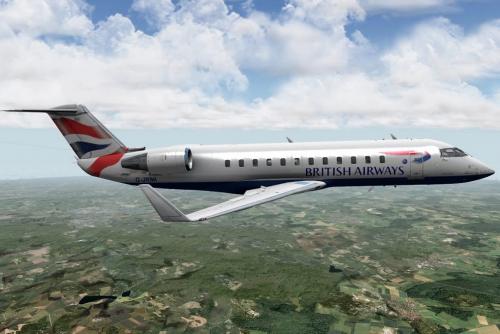
Honeycomb Bravo Throttle Template JRollon CRJ-200 v1.7.2 Import and activate via the Honeycomb Configurator v2.0.0.1 I've had the best success with 2.0.0.1 templates by starting X-Plane 11 and immediately reloading the bindings for all Honeycomb devices via the X-Plane 11 menu (e.g. Plugins > Honeycomb > BFC_Throttle > Reload Bindings). Honeycomb Config Tool tutorials: https://www.youtube.com/user/MrJaraNet/videos Obvious note: The blue cells (XP 11) are my own X-Plane 11 bindings. The dark gray cells are Honeycomb configurator bindings. Bravo Axis #2 detent: Engaging the detent will calculate your Vref landing speed (based only on weight, not altitude/temp etc) and assign it to V1, V2, Vr or Vt (whichever is currently selected) The limitations of the configurator software prevented me from implementing takeoff V speed calculations automatically (on axis #5 detent), which is a bummer because I wanted to do trim calculation as well. Assigning the calculated Vref speed directly to Vt within the CRJ-200's avionics was not possible without relying on a LUA script Throttle #1's red button (TO/GA) is not assigned in the configurator The Seatbelt Sign also switches the No Smoking sign to AUTO (if it's not already on AUTO) Altitude knob: The altitude knob adjusts only 10' per turn (on the throttle quadrant as well as clicking/scrolling on the knob). To change this to 100' per turn: 1) Open Plane Maker (close XP11 first) 2) (menu) Standard > Systems 3) Under the 'General 1' tab: Change 'autopilot altitude-select step size' from 10 to 100 You can do the same to the radio altitude-select step size if you prefer 4) CTRL + S to save. Exit Plane Maker.- 1 review
-
- 1
-

-
Version 1.0.0
66 downloads
Honeycomb Alpha Flight Control Template JRollon CRJ-200 v1.7.2 Import and activate via the Honeycomb Configurator v2.0.0.1 I've had the best success with 2.0.0.1 templates by starting X-Plane 11 and immediately reloading the bindings for all Honeycomb devices via the X-Plane 11 menu (e.g. Plugins > Honeycomb > AFC_Yoke > Reload Bindings). Honeycomb Config Tool tutorials: https://www.youtube.com/user/MrJaraNet/videos Obvious note: The blue cells (XP 11) are my own X-Plane 11 bindings. The dark gray cells are Honeycomb configurator bindings. [Battery Switch] Master Battery = ON Instrument Brightness = 100% NAV SRC = FMS No Smoking Sign = AUTO [BUS1] - Basically starts and stops the APU ON PWR/FUEL btn (open APU door) START/STOP btn APU LCV btn ISOL btn APU Generator switch = ON IRS 1 & 2 = NAV Hydraulic switch 3A = AUTO OFF APU Generator = OFF ISOL btn APU LCV btn START/STOP btn PWR/FUEL btn [BUS2] - Turns on/off all 4x hydraulic switches I had intended BUS2 to control the GPU but I haven't discovered a way to implement this on the CRJ-200 without relying on a LUA script. -
Version 1.0.0
151 downloads
Honeycomb Bravo Throttle Quadrant Template Aerobask Epic Victory v2.3.3 (This has not been tested with the new G1000 version) Import and activate via the Honeycomb Configurator v2.0.0.1 I've had the best success with 2.0.0.1 templates by starting X-Plane 11 and immediately reloading the bindings for all Honeycomb devices via the X-Plane 11 menu (e.g. Plugins > Honeycomb > BFC_Throttle > Reload Bindings). Honeycomb Config Tool tutorials: https://www.youtube.com/user/MrJaraNet/videos Obvious note: The blue cells (XP 11) are my own X-Plane 11 bindings. The dark gray cells are Honeycomb configurator bindings. * Lights on the throttle quadrant will not illuminate when the aircraft's battery is off. -
Version 1.0.0
60 downloads
Honeycomb Alpha Flight Control Template Aerobask Epic Victory v2.3.3 (This has not been tested with the new G1000 version) Import and activate via the Honeycomb Configurator v2.0.0.1 I've had the best success with 2.0.0.1 templates by starting X-Plane 11 and immediately reloading the bindings for all Honeycomb devices via the X-Plane 11 menu (e.g. Plugins > Honeycomb > AFC_Yoke > Reload Bindings). Honeycomb Config Tool tutorials: https://www.youtube.com/user/MrJaraNet/videos Obvious note: The blue cells (XP 11) are my own X-Plane 11 bindings. The dark gray cells are Honeycomb configurator bindings. * The L/R elevator trims are identical and aren't linked like Trim A/B; holding both down in the same direction simply offers a faster (2x) trim adjustment speed.


.thumb.jpg.681251c9081eff768a4de7086dc7ae73.jpg)
